Analysis Apertures

1 / 1

Auto Snapping

This powerful new improvement allows images, text and other pieces of content to be in-line with each other. To test this feature, open up any presentation. Add a piece of content, such as an image. Move the image around to see the power of auto snapping. Line up your content on the vertical line and add another piece of content. Move it around and watch as it snaps not only to parts of the canvas, but to your previously placed image.

Analysis Apertures

Nakeia Medcalf

Welcome to NuVuX

The Urban Institute of Data states that, "The number of Americans ages 65 and older will more than double over the next 40 years, reaching 80 million in 2040." As citizens of a multigenerational world, the way we design, develop compassion and empathy, and understand policy is unique to this era. The future of this aging population means that we will need to find commonality not through "othering" the elderly, but through world building that is inclusive, thoughtful and understanding. Designing and building synchronicity and synergy will allow for creative design solutions for the modern world.

In this studio, we will examine our aging population and think through how to evoke community, joy, empathy and democracy. We will analyze existing models of intergenerational, play and empathy design to develop architectural and engineered solutions for our intergenerational world. 

Analysis Apertures is our initial research and data gathering studio to analyze existing case studies, precedents and design interventions that address our intergenerational society. We will use data visualization to show our findings. 


Framing Question: 

How will your generation prepare for the future where there are more elderly than caretakers?


Focus Skills/Subjects/Technologies:

 Design

 Analysis

 Architecture

 Engineering

 Humanities

 Data Visualization

 3d Modeling


Who is Ben Johnson?

Nakeia Medcalf

Ben is an empathetic, energetic, Bay Area native interested in the intersection of biology, design, materials, and technology to engineer systematic solutions. Ben is the connective tissue for people and knowledge. He values collaboration above all else. Ben is extremely curious about emergence -- how local interactions change over time to create complex, macro-level systems with unique behaviors the individual parts do not possess. He seeks to identify pattern languages within multidimensional data to discover unconventional ways to process information. Ben loves collecting rocks, is fascinated by crystallography, and wants to tap into theories on graphs, color, and motion to create tangible networks of understanding. His passion for providing design thinking for low-income youth continues to grow.

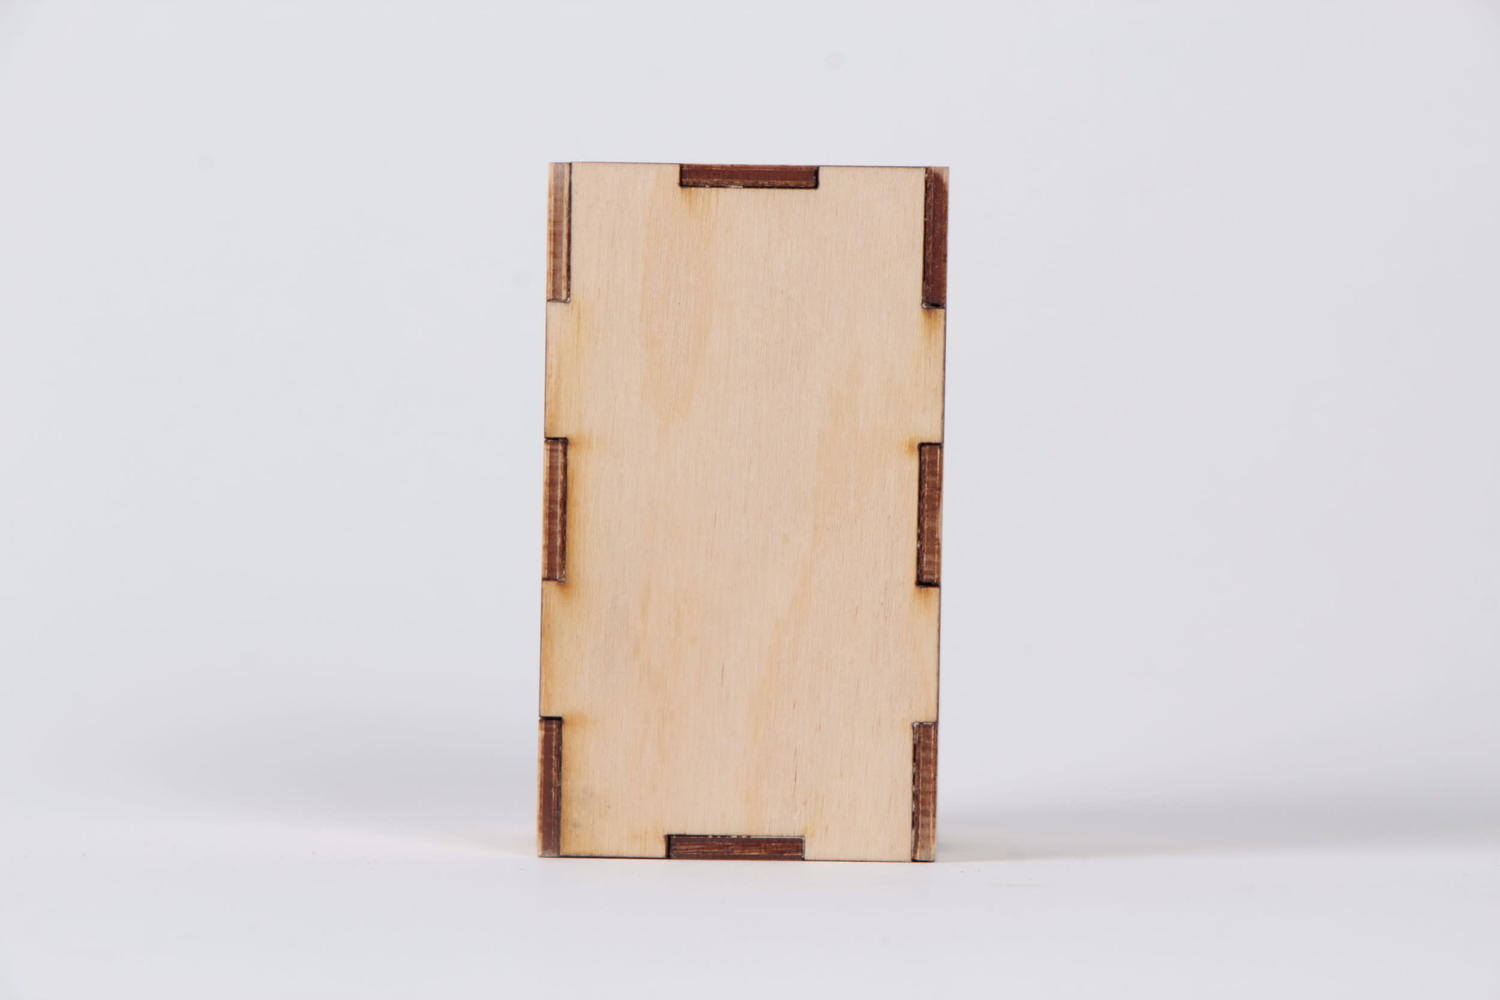
Tabs are the easiest and strongest method to assemble laser cut components. Tabs are traditionally used at NuVu to join two laser cut pieces perpendicularly, although it is possible to use tabs to join things at funky angles, it's significantly harder. 

Creating tabs in Rhino and fusion takes some getting used to. The first thing to think about is material thickness. To make this cube we are going to approach it one joint at a time. The final dimensions of the box we want are 52mm X 52mm X 90mm. Below is a picture of what we will make to start the box

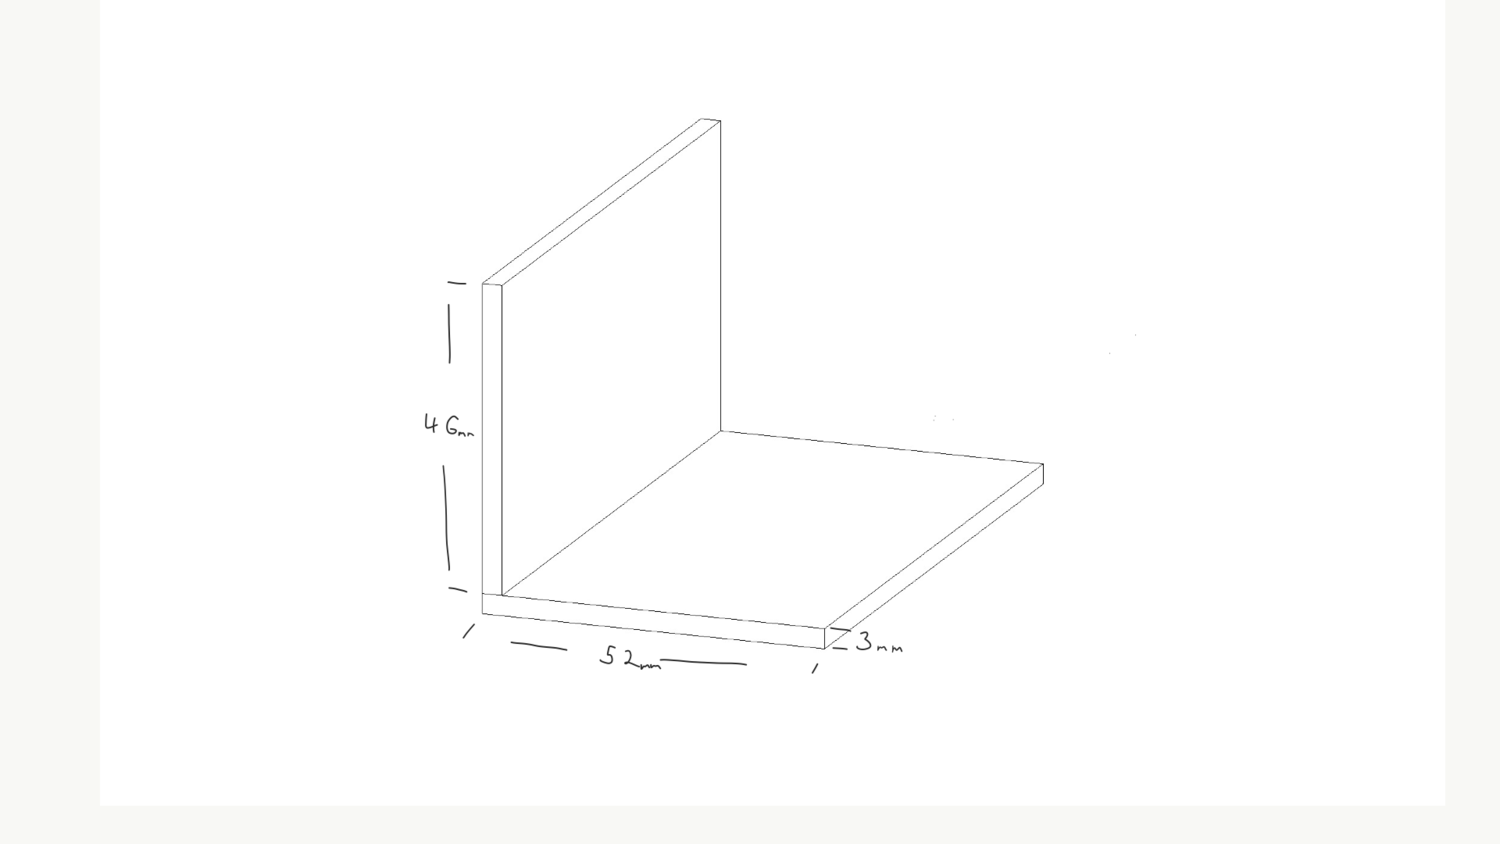
Notice how the side piece is only 46mm even though we want the height to be 52mm. This is because there will be a piece of 3mm thick wood above and below the side so it will add up to the desired dimension. 

Next, we are going to go into rhino and start drawing our boxes. 

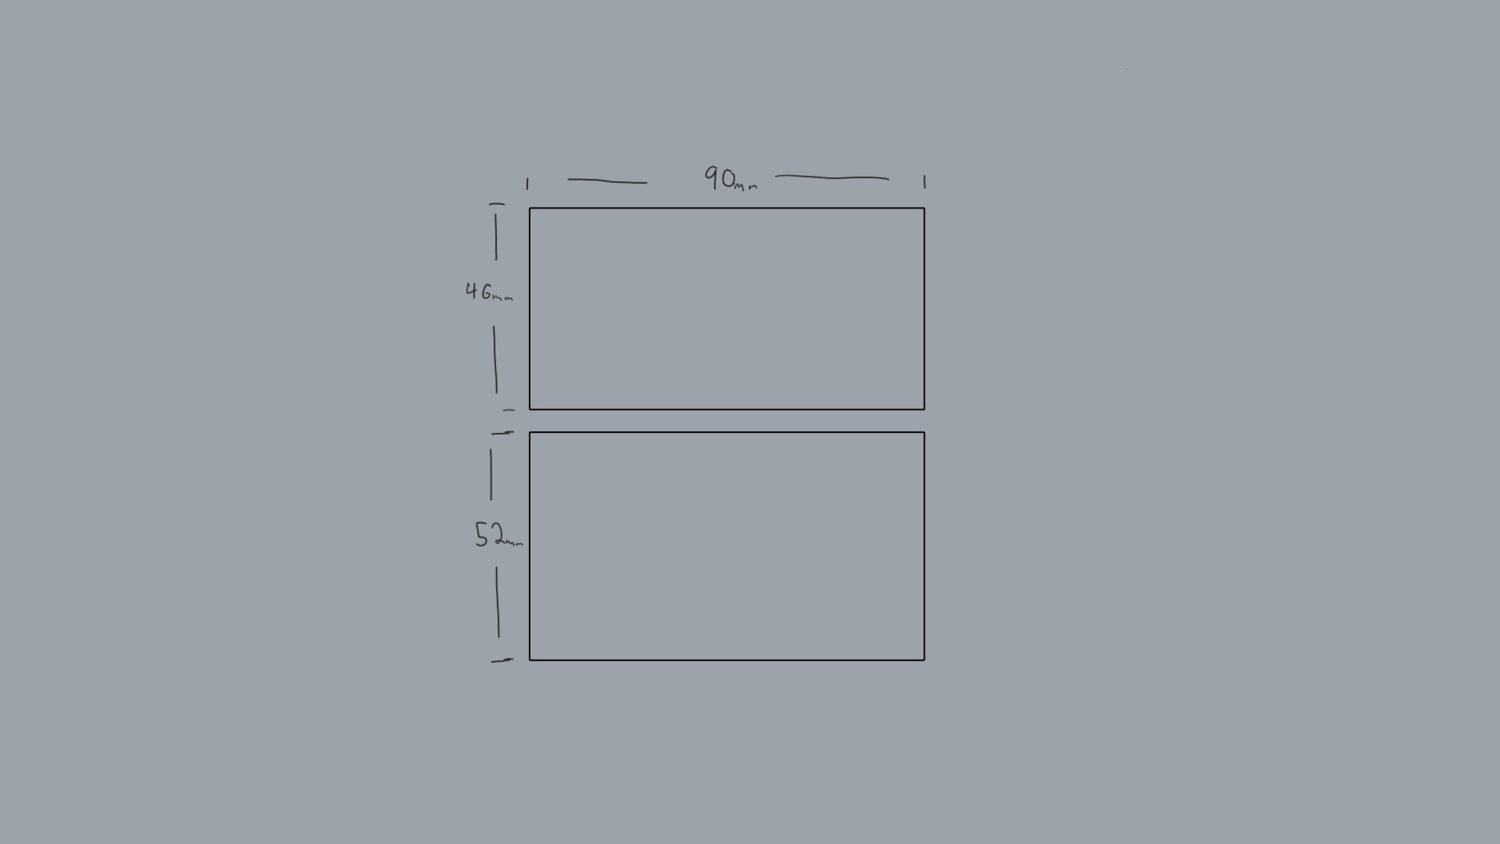
The next step is to explode the rectangle and divide the line that will receive the tabs into equal segments. In this case, I will divide it into 5 segments. the number of tabs you use will depend on how long your joint is, but 5 is almost always a good number to use. 

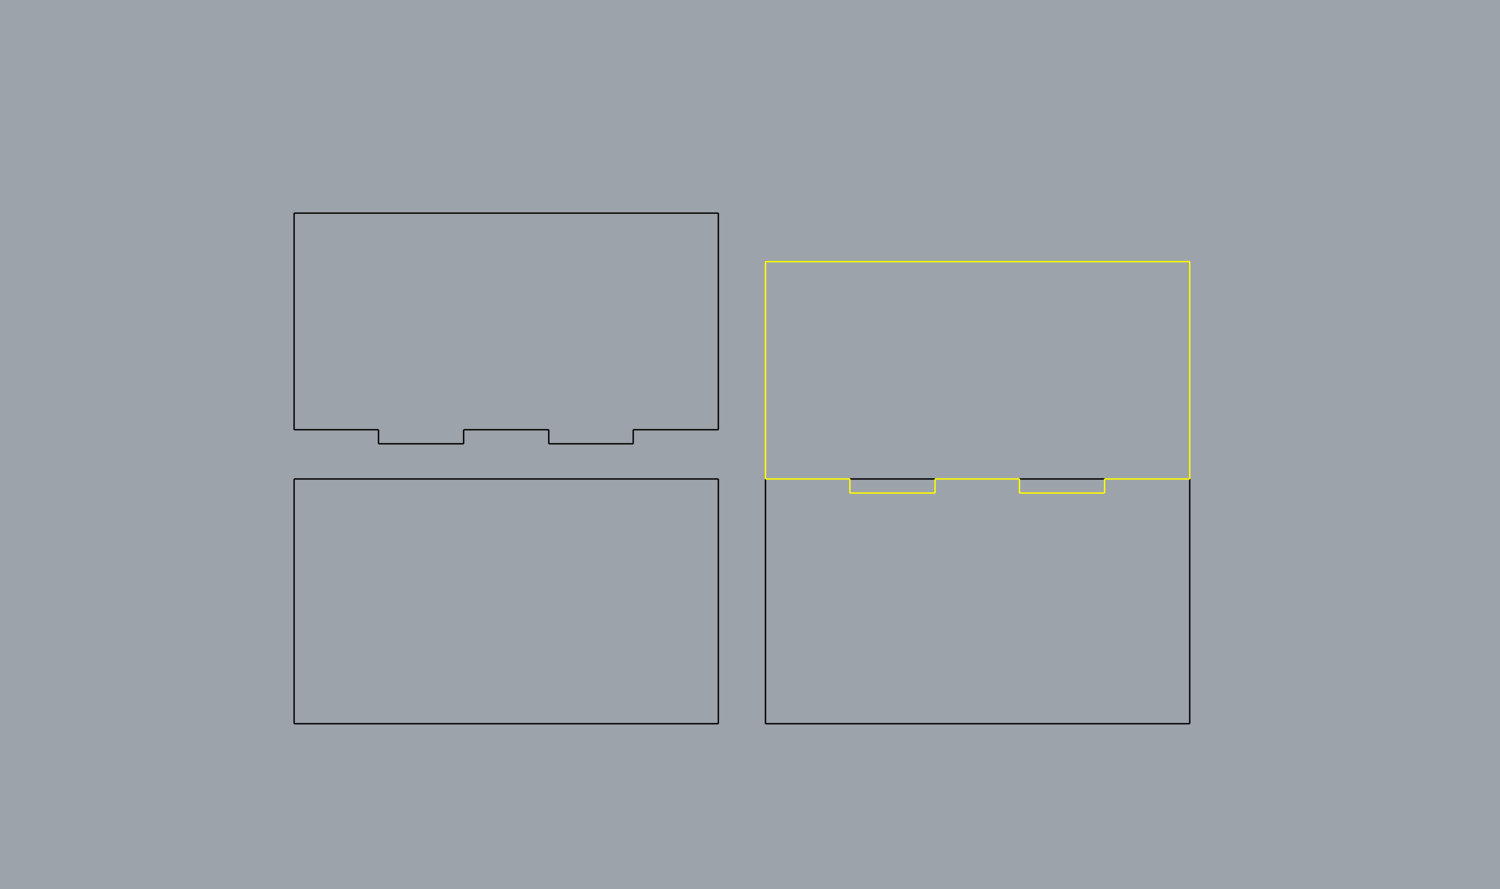
Now we're going to start making the tabs. The next thing we have to is to think about which rectangle we will add material to and which we will cut into. In this case, the smaller box will receive the extra material and the bigger one will be cut. 


Use the three-point rectangle tool to create the tabs. Then delete the points from the divide toll and trim. 

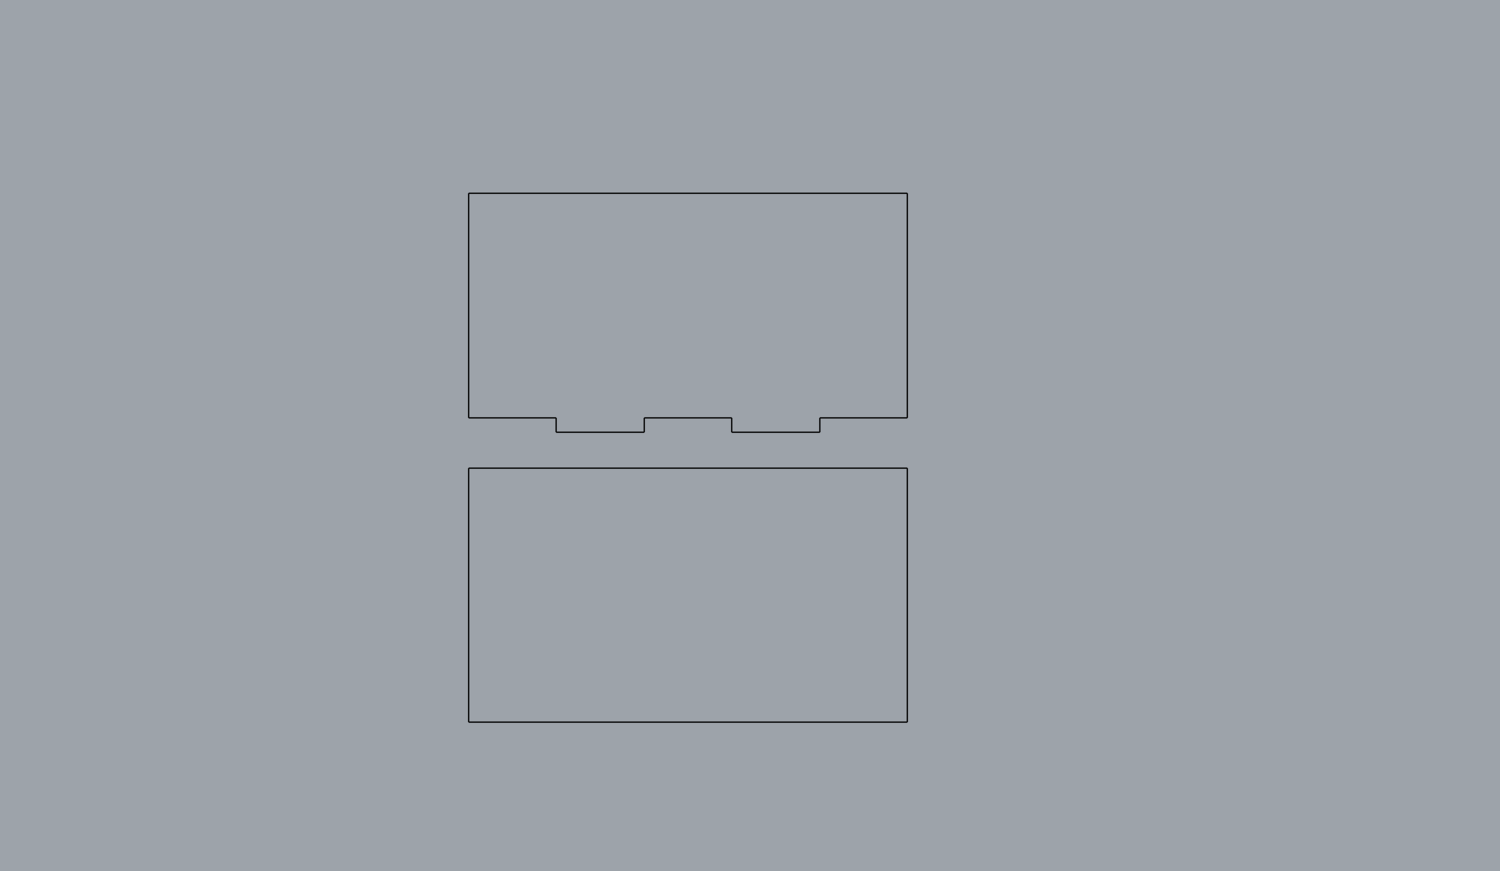
Now to make the tabs on the other side all you have to do is move a copy of the first one into the second rectangle and trim. 

You will then repeat this process for all the other sides.  

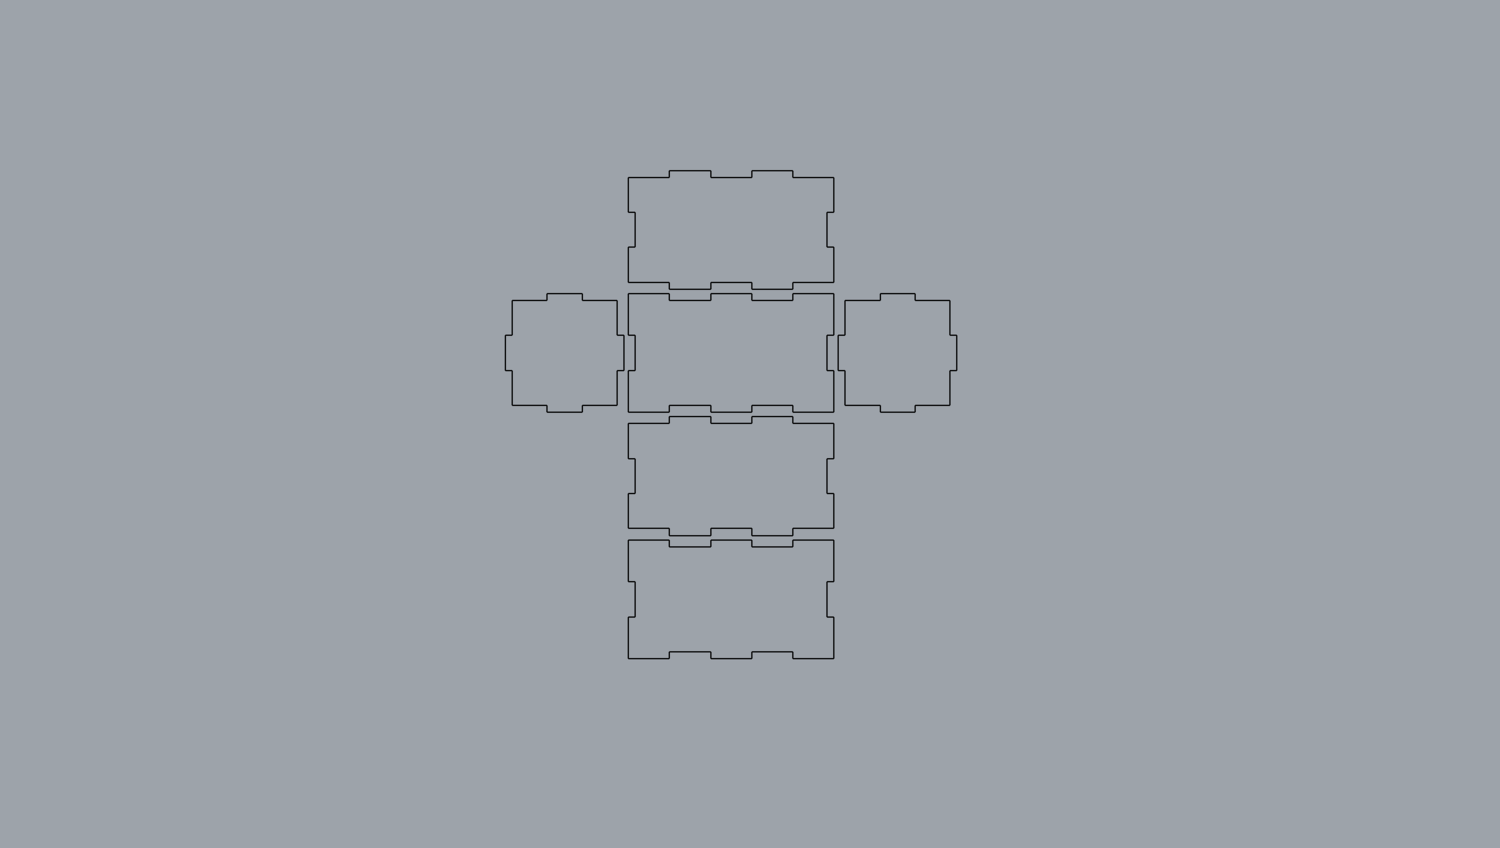
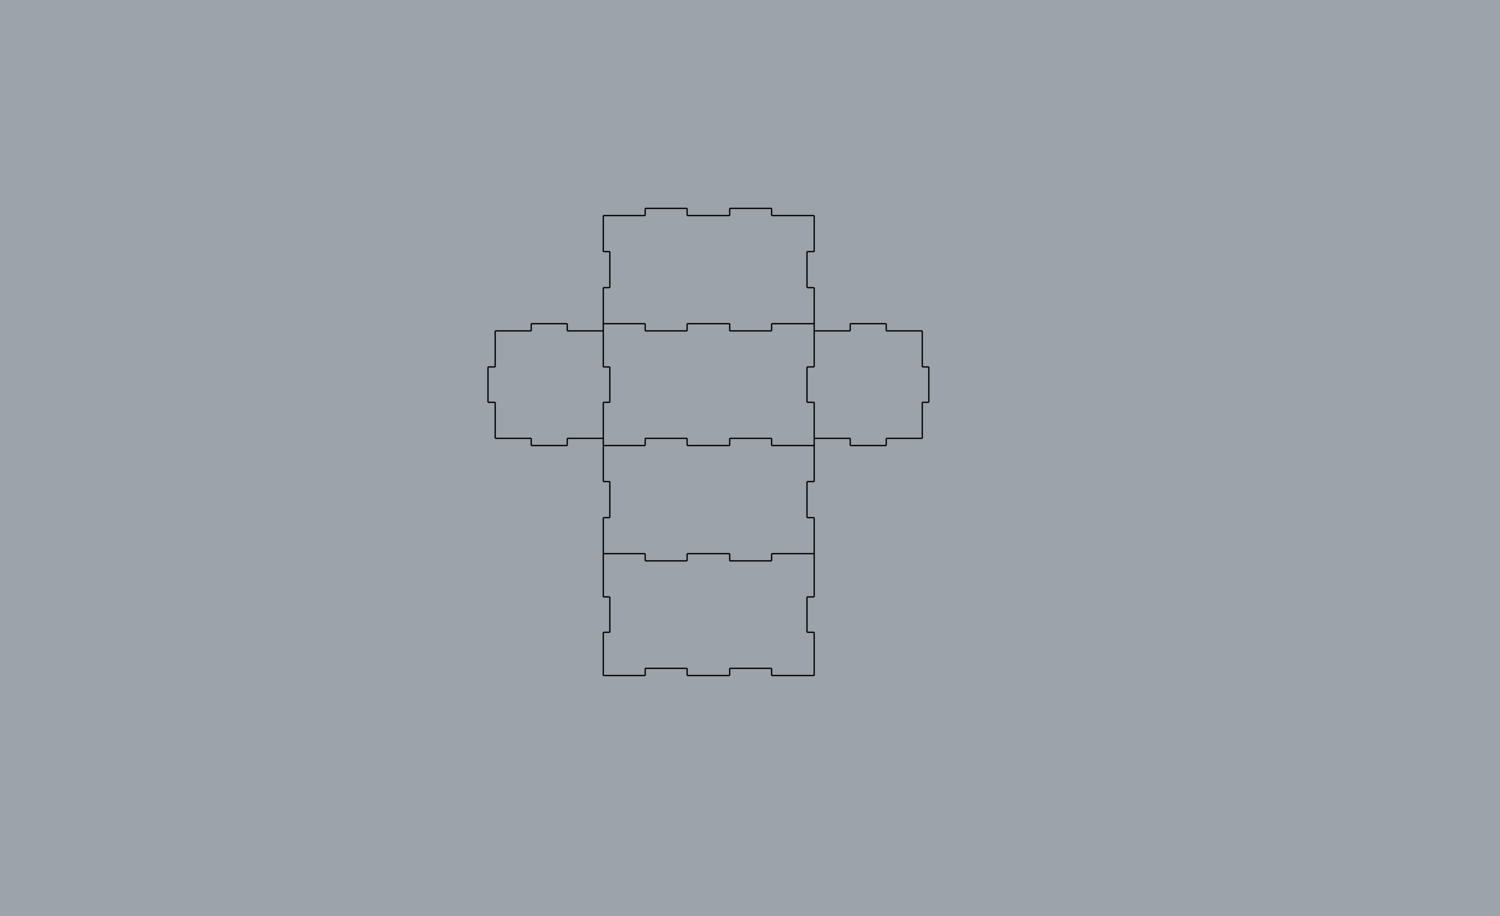
Finally, you can move them together and make 2D for laser cutting. 

Steps in rhino:

  • Draw the sides of your shape and account for material thickness
  • Explode rectangles
  • Use the divide tool to divide one of the sides of the rectangle into equal parts. 
  • Draw tabs using the three-point rectangle tool
  • Trim and join
  • Move  a copy into other rectangle and trim
  • Move together
  • Make 2D

Auto Cropping

Auto cropping changes the way you crop images. To test this feature, open up any presentation. Add a new image and replace it. After this, your content may be auto cropped. Our editor will crop your image so that center most content is cropped. To return your image to its original size, simply resize your image.

Text Editor


Align Left, Middle, Right, Justified

Each of the top options will align your text based on the selected button. From left to right, the options are: Left, Middle, Right and Justified.


Font

Select the font name to open up a menu for selecting a new font. Scroll up and down to select your font.


Font Weight and Font Size

Click on the weight of your font (Regular on the picture to the right) to change the font weight. Clicking on the numbered value will bring up a menu to select a new font size. 


Line Height

Click on the number next to Line Height and a menu will appear. Select a new Line Height from this menu.


Letter Spacing

Click on the number next to Letter Spacing and a menu will appear. Select a new Letter Spacing from this menu.


Bold, Italic, Underline, Strikethrough, Bullet List, Numbered List

Each of these options appears in line, in the order listed above. Select each button to begin typing in that style, or highlight text and select a button to apply that style to it.


Text color

Selecting the black circle (in the example to the right) to bring up the color menu. Select a color from the presets or type in a #HexCode value to change the text color.


Background color

Selecting the transparent circle (in the example to the right) to bring up the color menu. Select a color from the presets or type in a #HexCode value to change the text color.


Center

Select this button to move the currently selected content to the middle of the editor. Centered both horizontally and vertically. 

Creating your First Presentation

In this video, we will be talking about creating your very first presentation. We will go over basic navigation to a new presentation, creating new content and finally going over the tools available.  After this post, consider checking out other tutorials, such as the Types of Content tab or check out the master list of Slide Editor Tools to get a more advanced look into the Slide Editor.

Follow these steps to reset your password on the NuVu website.

Resetting your password on the website is the same process as setting up your password for the first time. The post Logging in for the First Time covers this content, but it will be repeated below for ease of access. If you'd prefer to digest this information in Video form, please click the link mentioned above for a video. 

  1. Go to your school's domain, such as https://cambridge.nuvustudio.com.
  2. Go to the top right corner of the page and click on Login.
  3. Click on Reset Password, enter your Email and click Send Password Reset Link.
  4. Go to the email you entered in the previous step and look for an email from NuVu with the subject line: "NuVu Password Reset Instructions". Open up this email and click on the pink button titled: Reset your Password.
  5. Follow the link from Reset your Password. Enter a new password once, and then again to confirm. Afterwards, click Update Password to finalize your new password. You'll be automatically logged in. 

Follow the steps in the video to log into the website for the first time.

  1. Go to your school's domain, such as https://cambridge.nuvustudio.com.
  2. Go to the top right corner of the page and click on Login.
  3. Click on Reset Password, enter your Email and click Send Password Reset Link.
  4. Go to the email you entered in the previous step and look for an email from NuVu with the subject line: "NuVu Password Reset Instructions". Open up this email and click on the pink button titled: Reset your Password.
  5. Follow the link from Reset your Password. Enter a new password once, and then again to confirm. Afterwards, click Update Password to finalize your new password. You'll be automatically logged in.